
10kVA Victron Off-Grid Electrical System for an Overlanding Truck

Conrad contacted Tom and Charlie at Tiny Build Electrics after purchasing various Victron components for his dream Overlanding vehicle that Conrad and Steph, plan to travel the world in. He had sourced most of the parts from a marine electrical supplier, but when it came to amalgamating all of the kit together, he wanted to protect his investment and ensure it was installed, commissioned and tested correctly. Tom worked with Conrad to fit all the components into the correct place and create a solution for Conrad’s dream system.
Once the system design had been confirmed, Conrad sent a list of A/C circuits over to Charlie so that Charlie could set about designing the A/C distribution and ordering all the kit.
Book in for a FREE installation consultation here with Charlie
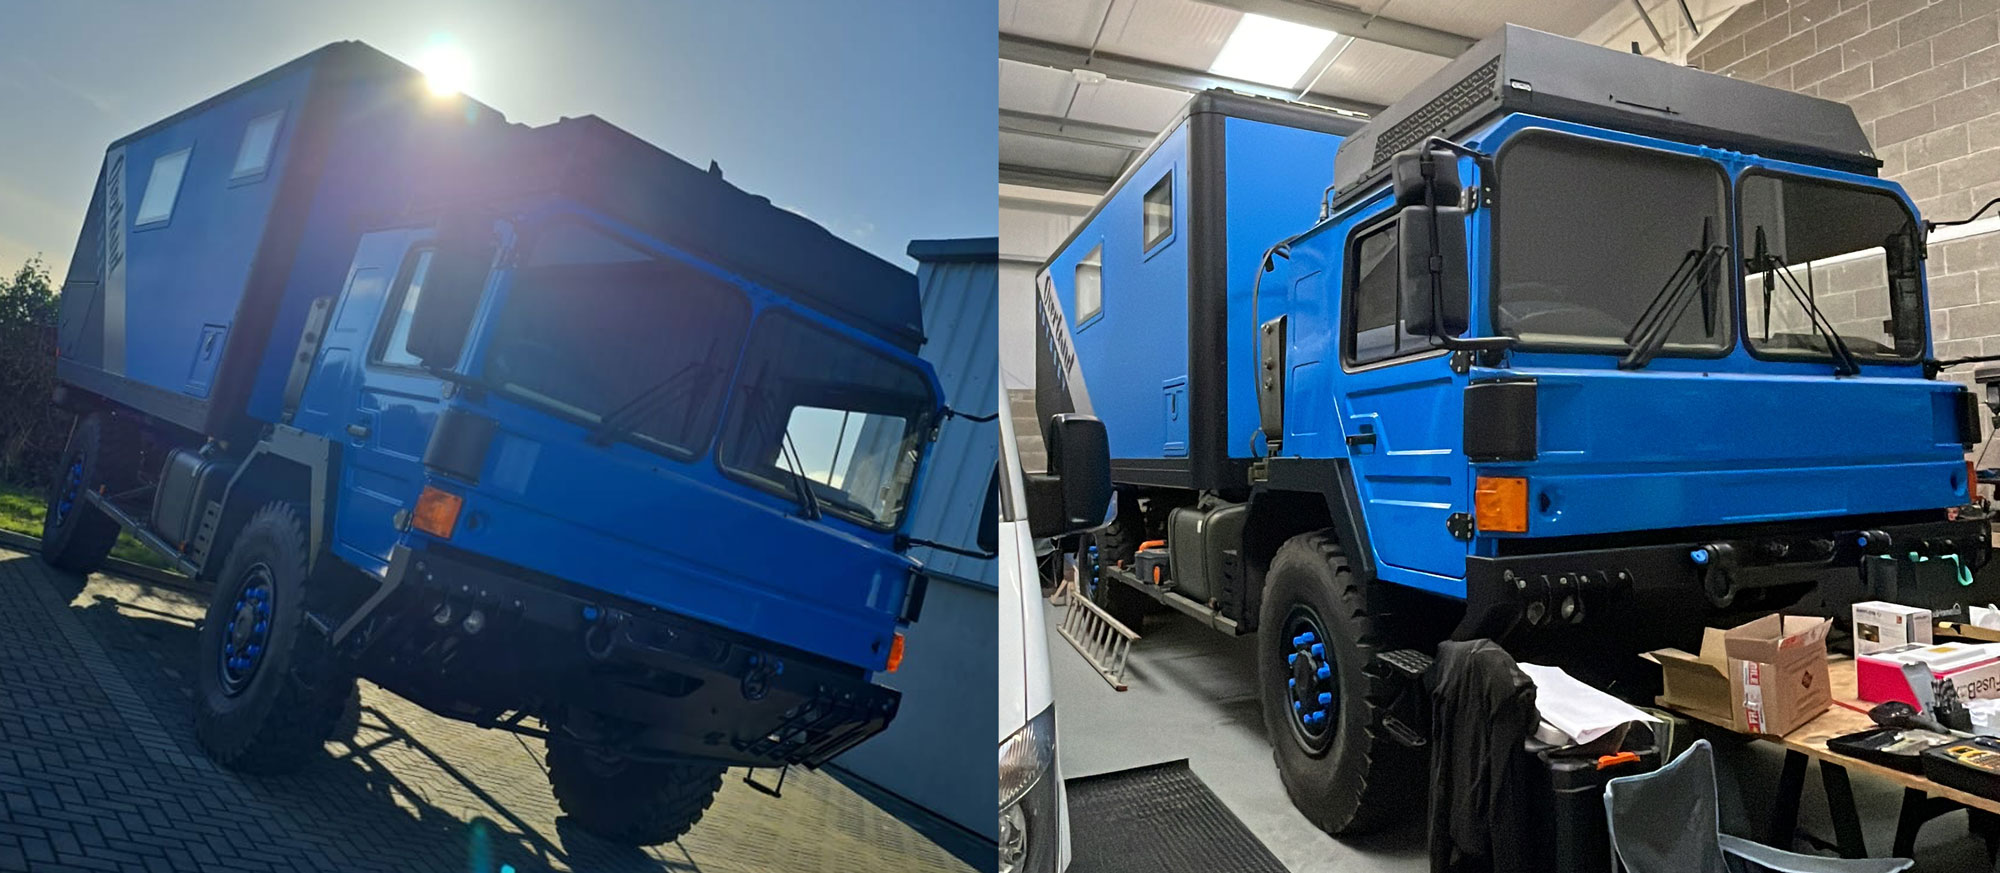
Tom at Tiny Build Electrics designs the overland truck’s electrical system
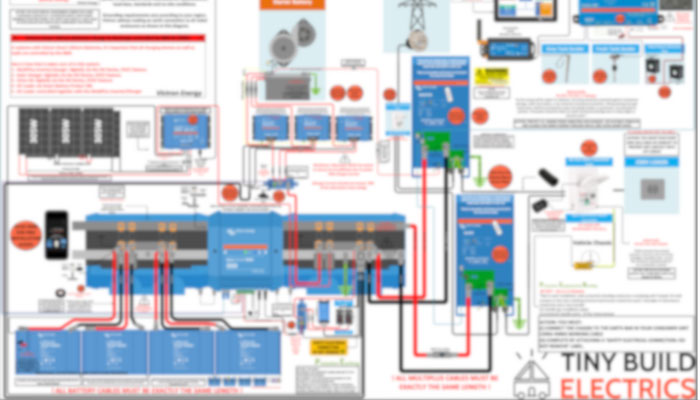
Tom set about designing this 10KVA / 800AH system, with many system components. Conrad wanted the whole system to be Victron Energy components. This meant that Tom had to integrate the Victron lithium batteries with Victron smart BMS. The detailed system design was going to make Charlie’s life a lot easier during the installation and commissioning stages.
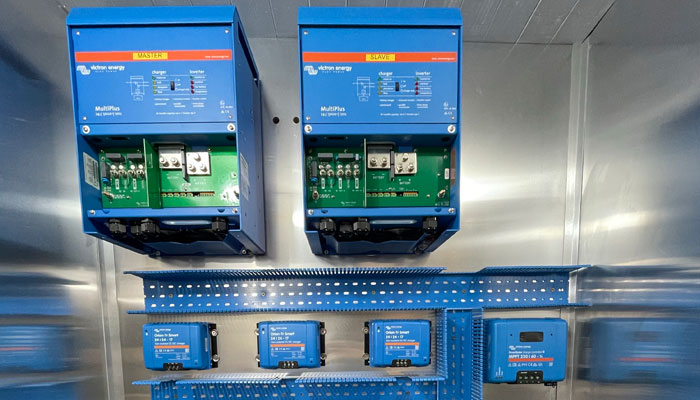
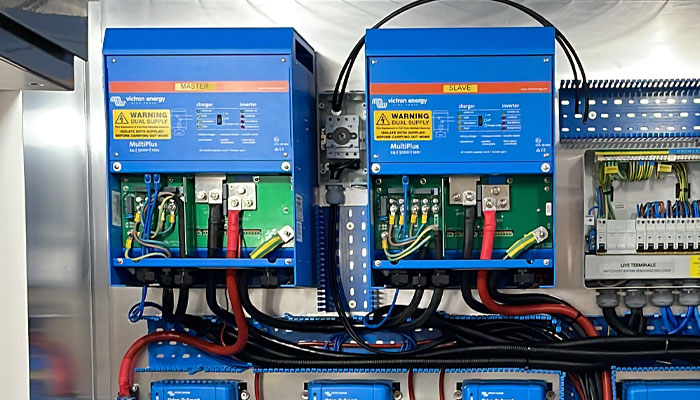
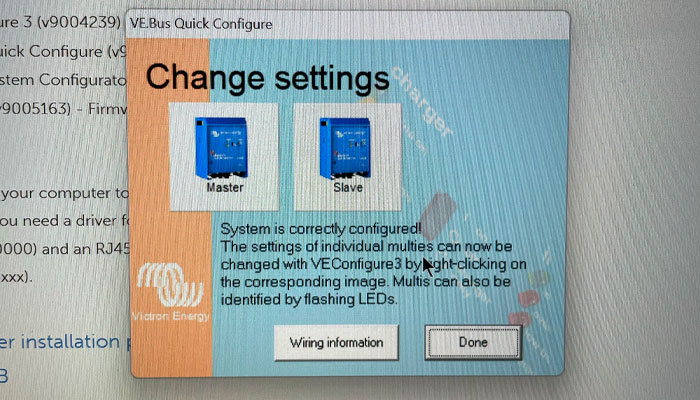
Conrad had expressed that he wanted a 10KVA system. This meant fitting two 5KVA Multiplus’s in parallel in order to give Conrad his required output. The first Multiplus would be the master, taking the majority of the load up until 5KVA at which point the slave would kick in and assist all the way up until 10KVA.
Tom created a quotation for all the necessary components to fit all the Victron Energy kit together. The items were delivered to Charlie’s workshop. This enabled Charlie to pre-build any components and ensure the installation would run smoothly.
Think you could benefit from a detailed schematic drawn specifically for your individual needs?

Overlanding Truck Electrical System Installation
The installation phase took place in a workshop on the Isle of Man. All materials were on site, minus a few Victron components on back order from Conrad’s marine supplier.
The entire system was to be mounted on an aluminium backing sheet. Not only did this make the installation look more professional but also allowed for better heat dissipation of the heat producing electrical components ensuring that the system ran as efficiently as possible.
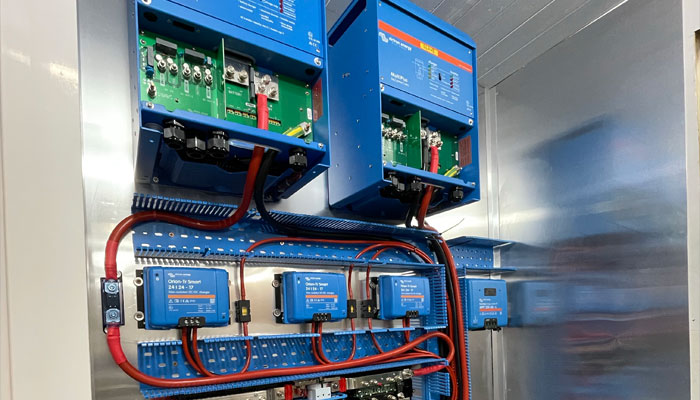
Charlie chose to install 100mm x 100mm blue panel trunking due to the large cable sizes and total amount of cabling involved. This allowed for a great level of mechanical protection as well as allowing any heat to dissipate.
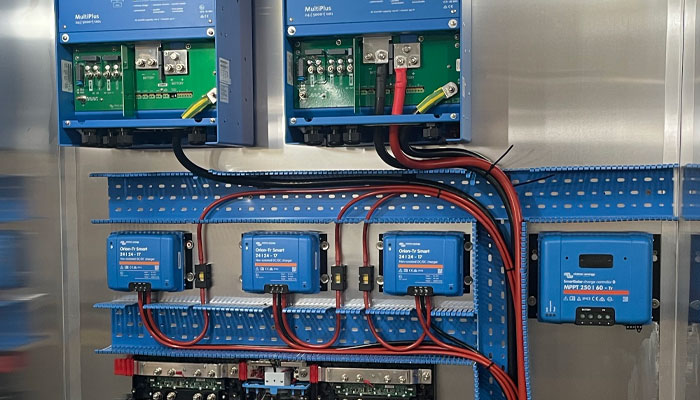
Once all the major components were mounted to the aluminium backplate Charlie commenced cabling the system. Starting with the earthing and bonding, then making his way onto the primary supplies from the Lynx distributor to the two Multiplus inverter chargers. At this stage it was clear there 100mm x 100mm trunking was a great initiative.
Charlie fed all the exterior cables down through a hole drilled in the floor. These cables were chassis bonding cables and DC-DC charging cables which would later make their way to the very large 24v truck batteries!
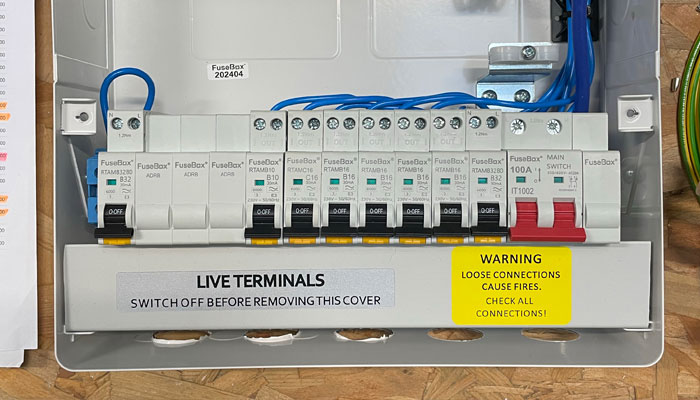
All of the primary DC cabling was fixed into place, the 230v consumer unit was built and the RCBO fly leads connected to the neutral bar.
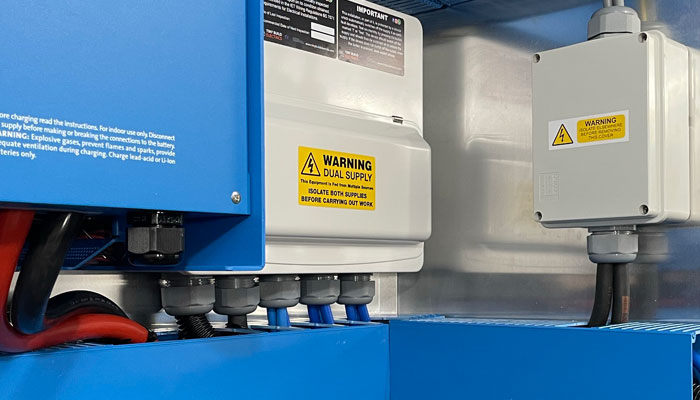
The consumer unit was mounted in place as well as an adaptable box which would parallel the Victron inverter supplies together. Charlie decided it would be tidier to do it this way than to send extra cables through one inverter.
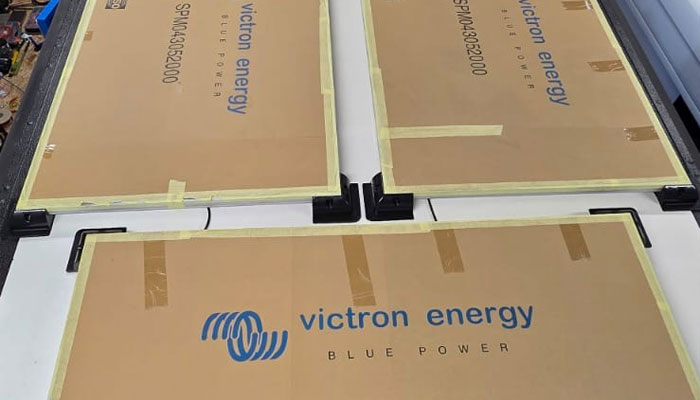
The solar panel isolator was connected and the solar cables poked through the skin of the habitation area. Conrad had laid the solar panels on the roof in their orientation, they would be fixed down at a later date. But for now, this allowed Charlie to connect the array into the isolator and then the beast Victron Energy 250 / 60 TR MPPT controller.
Find our Victron Energy components here
Connecting 4 x 200ah Victron Energy Lithium Batteries
Conrad built a base for the 4 x 200AH batteries to sit on which kept them secure as well as neat and tidy. Charlie cabled each battery individually out on the workbench, ensuring all cables were mechanically protected with flexible conduit, lugged, heat shrunk and that the terminal covers were fitted, this is something often forgotten in the industry.
Each battery was connected into the Lynx distributor, torqued and then the lynx cover was fitted. It was critical that each set of cables from each battery were exactly the same length, this meant finding the lengths of the cables for the furthest battery and then keeping the remaining cables the same.

Consumer unit for the 230V system
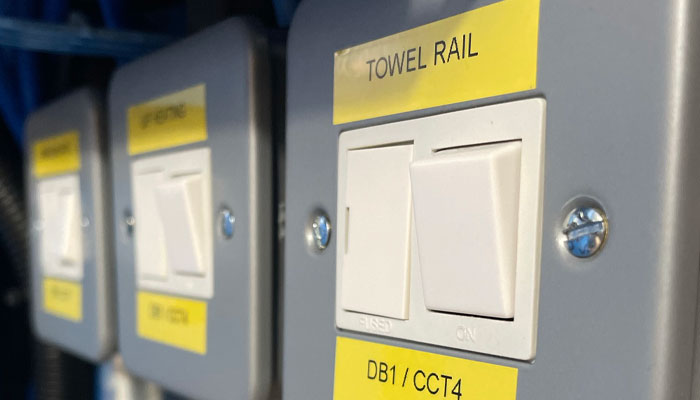
The installation was really starting to come together at this point. All the primary DC cabling had been installed and the consumer unit had been built and fitted into place. Conrad had ran all the circuits into the truck so Charlie just had to identify each one and then terminate them into the board and their respective mini RCBO.
The installation had many AC circuits so it took a while to terminate all of these neatly but also in order. There was a variety of circuits including underfloor heating, electrical towel rail, water pumps, hob and oven as well as habitation sockets. A few components were missing (not supplied by Tiny Build Electrics) so some parts of the installation had come to a halt. Charlie second fixed habitation sockets and all other fixed wiring that he could at that time. The water pumps and air conditioning unit were connected in the garage.
Testing and certification of the Overlanding truck’s electrical system
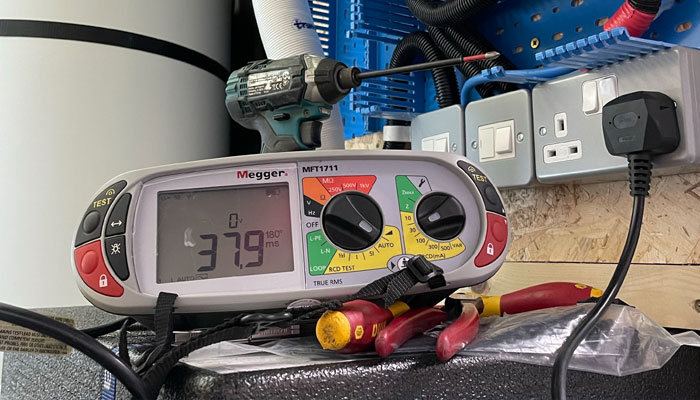
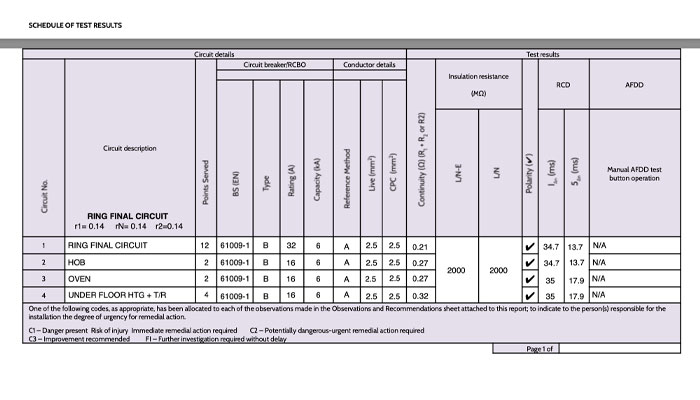
Once the installation phase was nearing completion Charlie could start testing. The tests carried out would prove conformity with BS7671 (UK’s wiring regulations) as well as ensuring the system was safe and that all protection devices operated correctly and within the allotted time.
Once complete Charlie would provide Conrad with a full electrical installation certificate with all readings specific to each circuit. Conrad not only wanted this for peace of mind but it was required for his insurance, this way he could prove that the installation had been installed correctly, safely and to the wiring regulations.
Finished your electrical system? Require some peace of mind and a certificate?
Contact Charlie and get booked in!
Commissioning
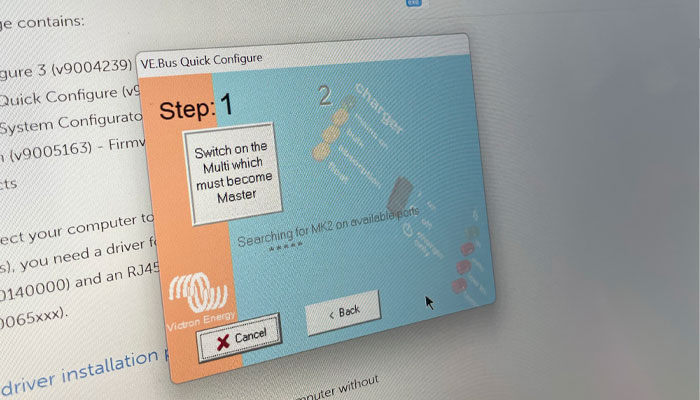
The commissioning stage took a couple of hours. Both of the Multiplus units, DC-DC converters, MPPT and the BMS needed to be updated to the latest firmware. Charlie set about programming the two Multiplus units in a master and slave orientation. The master would take all the load up until 5KVA and at this point the slave unit would kick in and assist.
The rest of the system was updated and setup to work alongside the other components, this all went smoothy and was simple.
This system was a massive undertaking with the time that was available to Charlie. Some long days were put in to get it the system complete. The satisfaction of receiving messages from Conrad and seeing it all up and running makes it sweet. The truck is due back to the workshop in a few months for some more second fixing and testing so we will be sure to update this study with some photos.
The system really is a beast, a go anywhere, do anything kind of system. Onboard Conrad has a domestic washing machine, induction hob, oven, towel rail, unvented hot water cylinder and underfloor heating. With all of these circuits running at 100% we still couldn’t get the system anywhere near 10,000w. Therefore we had to plug in various heaters, heat guns and loads to achieve a full load test.
This was a very interesting, satisfying project and we thank Conrad and Steph for letting us be a part of it!
Think Tom and Charlie could help you with your overland project?
Get in touch and they will be happy to help!